![]()
To further organize content on your Web site, create folders to store related content. To add a folder, follow these steps.
1. Navigate to and click the folder within which you want to create the new folder (that is, the parent folder).
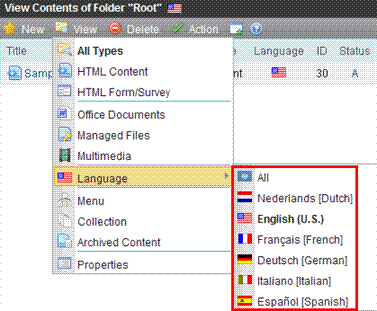
2. Each folder has a default language. By default, it is inherited from the parent folder. To change a folder’s default language, use the parent folder’s View > Language selection (shown below).
Note: When a user adds content to a folder, the default language is applied to the content unless the user explicitly changes the language. So, you should select a default language in which you expect the majority of folder’s content to be created.
3. Choose New > Folder.
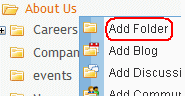
Alternatively, you can hover the cursor over the folder, right click the mouse, and choose Add Folder.
4. The Add a folder screen appears.
5. Complete the fields. See Fields on the Folder Properties Screen.
6. Click Save ( ).
).
You can modify the folder’s properties, permissions, approval chain, etc. For a list of options, see Folder Properties Toolbar.
If this is a Community Folder, see Community Folders.
If this is a Site Folder, see Supporting Multi-Site Configurations.


![]()